Calendar
The calendar helps you get organized and spend less time scheduling your week. You can display records from different Apps in one centralized view. The calendar can be accessed by clicking the calendar icon in the top navigation bar.
Displaying Apps in the calendar
To get started, you need to select the Apps you want to display in the calendar. You can do this by clicking on Add Calendar.
After you select an App, you need to choose which Date Field will be used to display the records in the calendar.

-
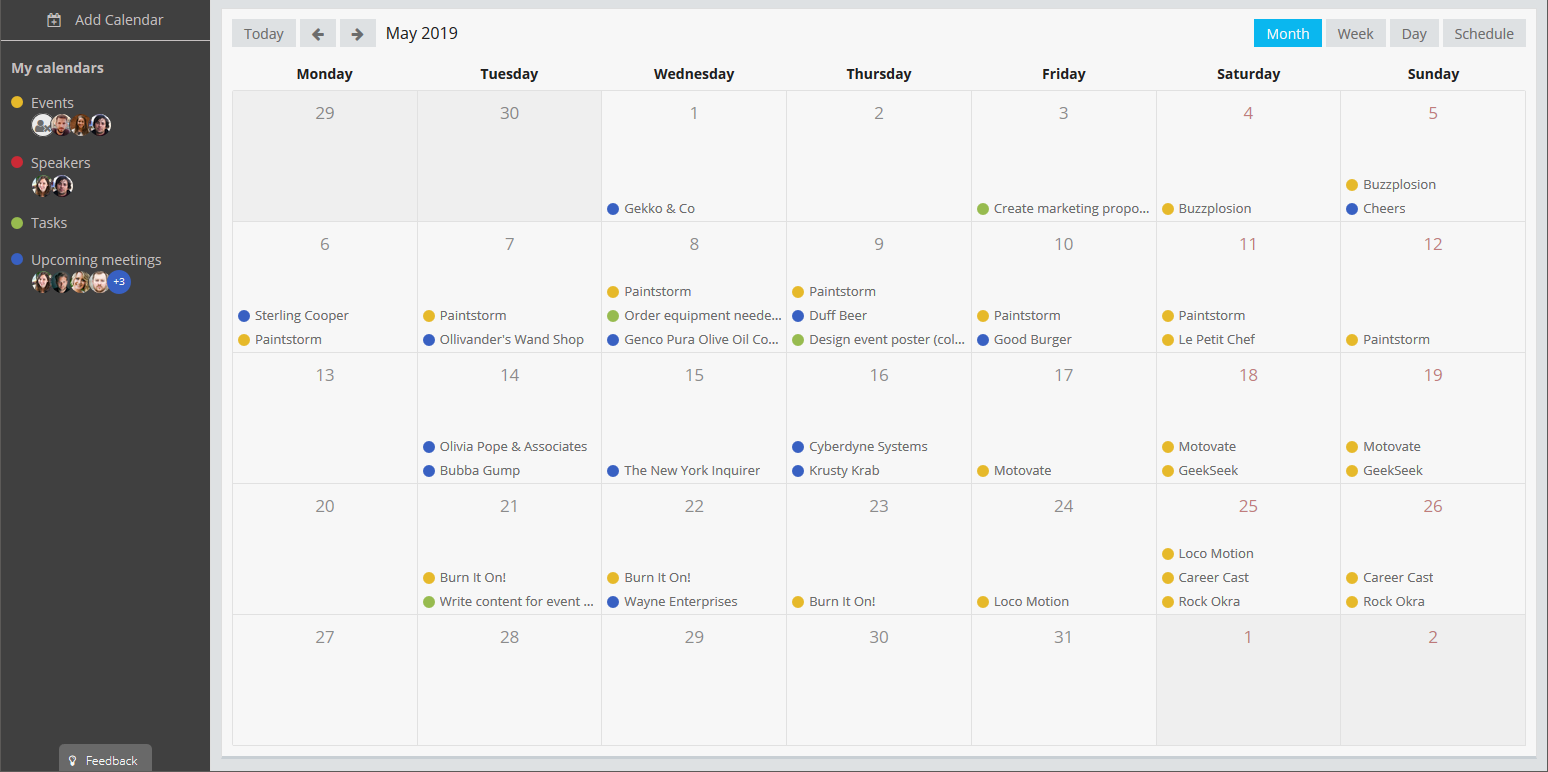
Date Field: This setting is used to place records on the calendar.
In the image above we have chosen the Show Date Field for the Events Calendar. This means that if an Event's show date is on the 8th of May, that event will be displayed on that same date in the calendar.
-
Link to User Field (optional): This setting is used to filter the records which are displayed in the calendar. If left empty, all records will be displayed.
In the image above we have chosen the Assigned to Field for the Events Calendar. This means that only Events where the Assigned to Field contains one of the selected users, will be displayed in the calendar.
This is a simple filter that works only on the Link to User Field. If you want to use more complex filters, check the Calendar Filtering section.
Different Calendar Views
Apart from the month view, there are three other calendar views which can be used.
The day view is ideal if you want to focus on what needs to be done for the day and manage priorities accordingly.

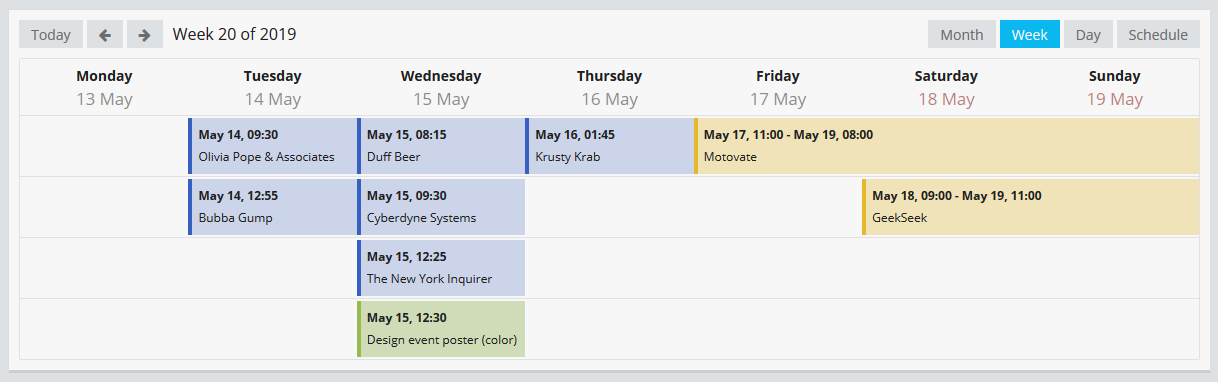
The week view gives you an overview of what is planned for the week ahead.
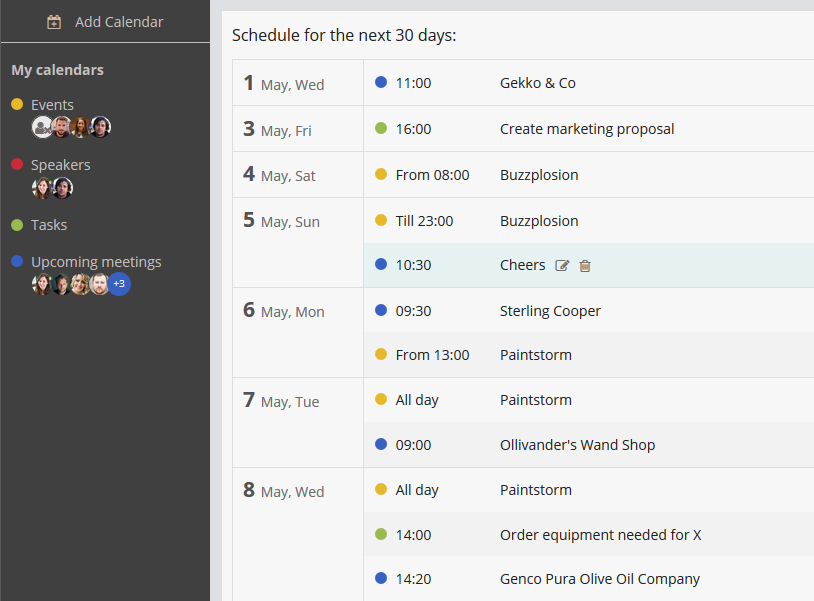
The schedule view displays an agenda of what is happening in the next 30 days.
Note:
Unlike the other views, in the schedule view you can't drag & drop records. You can still edit records and change their dates.
Grouping
In the Day View, you can group records by the assigned user.
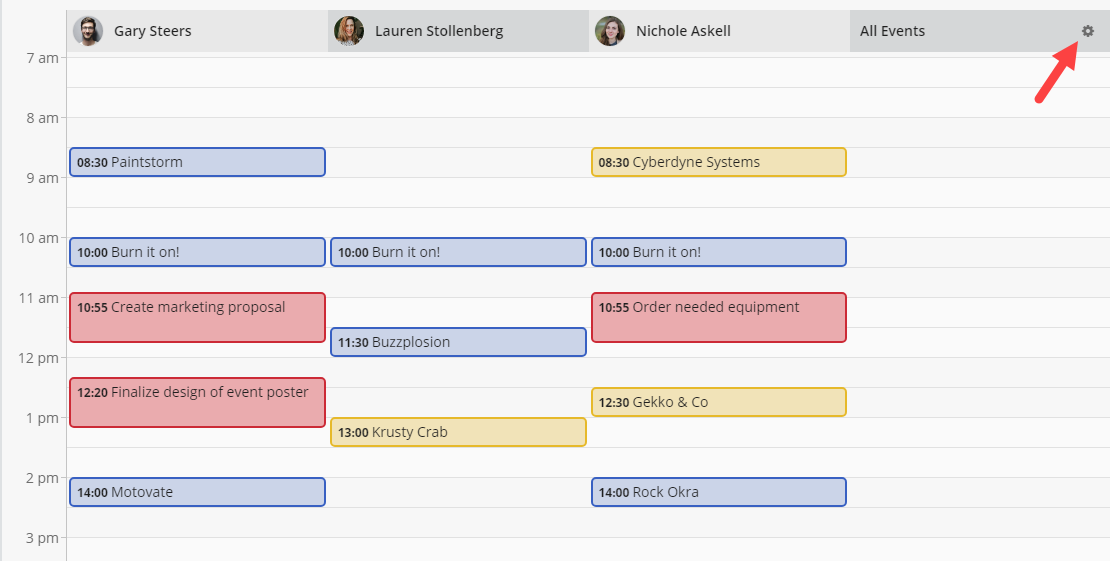
This makes it easier to view the schedule of all users across all Apps added to the calendar (e.g. Task Deadlines, Meetings, Holidays).
When using the grouping option, you can also change the assigned users by dragging & dropping records between users.
Note:
Grouping works only on Apps that have a Link to User Field selected in the calendar settings, otherwise all records from that App will appear under All Events.
Sharing a Calendar
There are three main advantages when sharing calendars:
- Team members won't have to recreate a similar calendar.
- When you invite new users to your workspace, you don't have to set up their calendars.
- When you update a shared calendar, it will automatically be updated for everyone.
Note:
Only the user sharing the calendar can update that calendar. Other team members can use that calendar or make a copy. They will not, however, be allowed to update the original calendar.
Lite Users can't copy shared calendars.
You can change how a calendar is shared from the calendar settings.
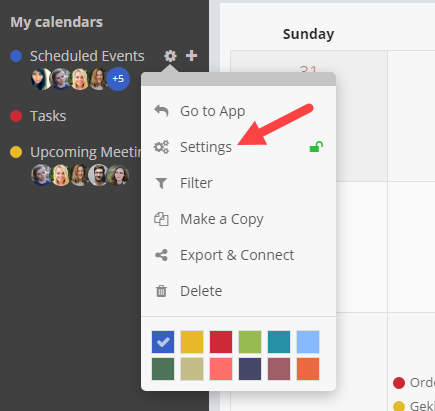
There are three sharing options:
- Private - Only you can access this calendar.
- Shared - Only you and other Regular Users can access this calendar.
- Public - Everyone can access this calendar, including Lite Users.
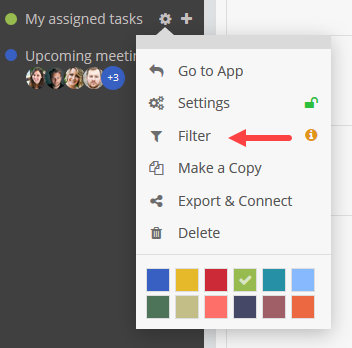
Calendar Filters
As the name implies, calendar filters are used to filter out the records that you don't want displayed in the calendar. Instead of creating your filters from scratch, you can used existing Saved Views (in your Apps) as a template.
Some examples of filters you can use:
- Display ongoing Tasks only.
- Display specific type of Events.
- Display Projects at a specific stage.
Filters can also be used to create dynamic calendars which can be shared with other team members.
For example, you can create a My assigned tasks calendar. You can do this by using the is user signed in condition.
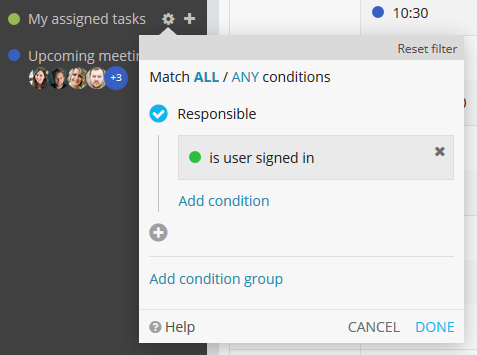
When you share this calendar, every team member will only see the tasks assigned to them in the calendar.
Calendar Integrations
There are various ways to integrate your Fusioo calendars with other third-party calendar applications.
1. In-built integrations
This is the best option as it will create a two-way sync connection. This means that updates perform on the third-party calendar application will be automatically applied to the Fusioo calendar.
It also takes significantly less time to sync the changes. In most cases, updates will sync in up to 15 minutes.
Check out the existing integrations:
2. Subscribe to the calendar iCal feed
The iCal feed is compatible with many third-party calendar applications. This option can be used when you need to share a Fusioo calendar with people that don't have access to your Fusioo account.
This is a one-way sync. Changes made in Fusioo will be reflected in your third-party calendar application, but changes in the third-party calendar application won’t sync back.
Check how you can Subscribe to a Fusioo Calendar in Apple Calendar.
3. Download an ICS file
You can also download a snapshot of your calendar at a particular point in time as an ICS file. Similar to the iCal feed, this is compatible with many third-party calendar applications.
Unlike subscribing to a calendar iCal feed, the downloaded ICS file will not sync with any future changes made to your Fusioo calendar.