Saved Views
Fusioo lets you filter your data in real-time. This is useful when you want to focus on particular data segments. For example, you might want to only view records:
- Related to a particular customer
- Created this week
If a particular data segment is frequently used, you can save the filter as a Saved View.
What is a view?
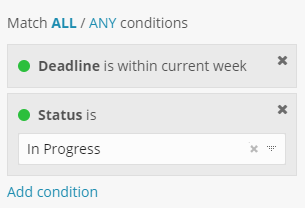
A View is a filtered data subset, defined by conditions that you set. For example, the following view will only display tasks which are In Progress and have a deadline set for the current week.
How to filter your data
You can start filtering your data from any Dashboard in your Apps.
-
Click on Showing the default view

-
This will open a panel which displays the Fields available in your App.
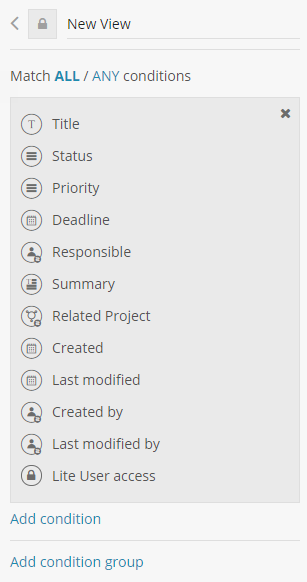
-
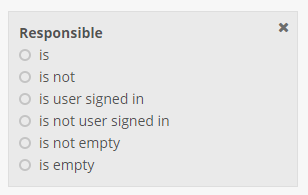
Clicking on any Field will display a set of conditions available for that Field. The list of possible conditions depends on the Field Type.
-
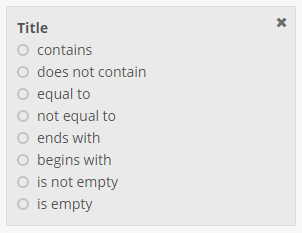
Click on any option to select it. In some cases (e.g. when using "contains", "equal to") you have to enter a value for the condition to be valid.


Note:
To select a different condition (for example changing "contains" to "equal to"), just click on the active condition. The data will update in real-time to match the new conditions.
Saving views
If you frequently filter your data to look at a particular segment, saved views are what you're looking for. With Saved views you can save a set of conditions so that you don't have to create them from scratch every time.
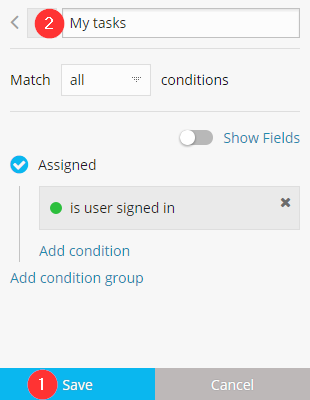
Whenever you're filtering data, you can click on Save (1) to use that view later on. Just set the name (2) and you're good to go. You can also share (3) saved views with your team members.
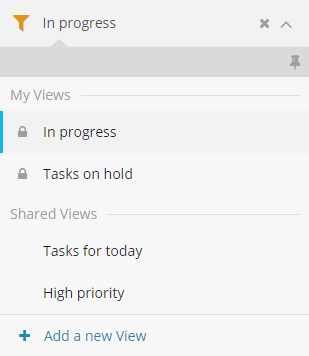
You can find all your saved views by clicking on the Saved Views drop down. From here you can quickly change the active view, create a new view or modify the existing views. Saved views can be used across all Dashboards within your App.

Sharing views
There are three main advantages when sharing views:
- Other team members don't have to create them again.
- When you invite new users to your workspace, you don't have to set up their views.
- When you update a shared view, it will automatically update for everyone.
Note:
Only the view creator can update the shared view. Other team members can use that view or copy it for their personal use but they can't update it.
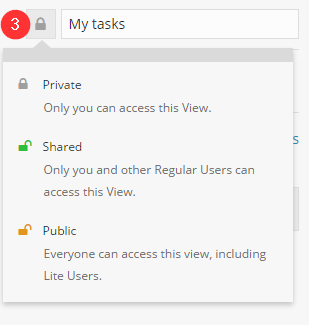
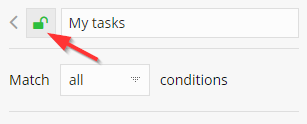
You can share a view by clicking on the lock icon near the view's name.
There are three sharing options:
- Private - Only you can access this view.
- Shared - Only you and other Regular Users can access this view.
- Public - Everyone can access this view, including Lite Users.
Note:
If a shared view uses conditions on Fields which are not accessible by a specific Role, that view will not be available to any user in that Role.
Shared views are available in the Saved Views drop down.