Creating your first App
In this step by step guide, you will learn how to create your first Fusioo App from scratch.
To keep it as simple as possible, you’re going to create an App to track and manage your team’s projects.
-
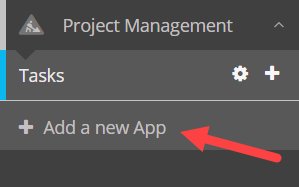
1. From the sidebar, click on + Add a new App
-
2. Name your new App or start from an existing template
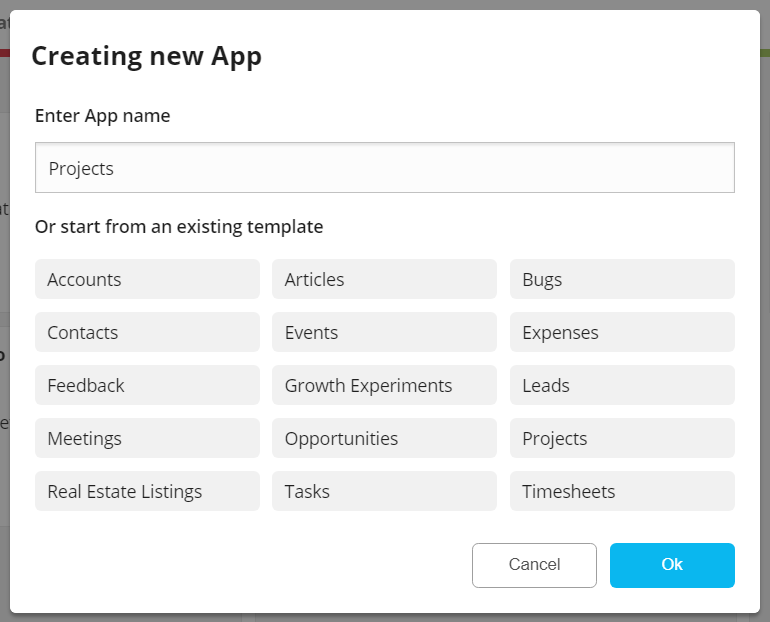
If you decide not to start with an existing template, you should pick up a name for your App and click Ok. To name your new App, ask yourself, “What do I need to track and manage?”. In our case, this would be Projects.
If instead you opt to choose an existing template, just select a template and click Ok. You can modify any template once it is activated. You can install any template, multiple times.
-
3. Click on Create
Congratulations! You’ve created your first App.
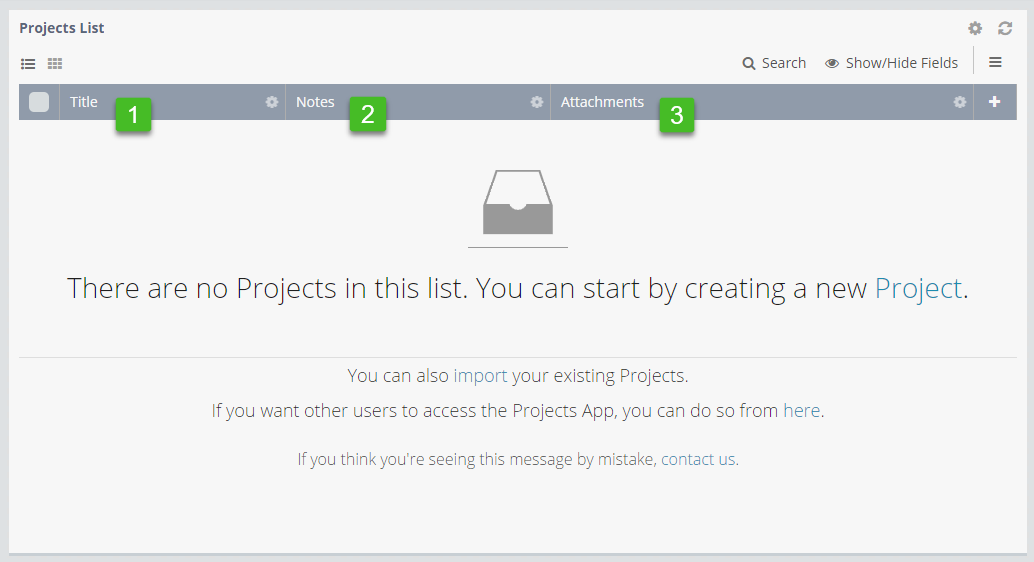
Your App is created with three default Fields; Title, Notes and Attachments. You can change these Fields as you go along.
-
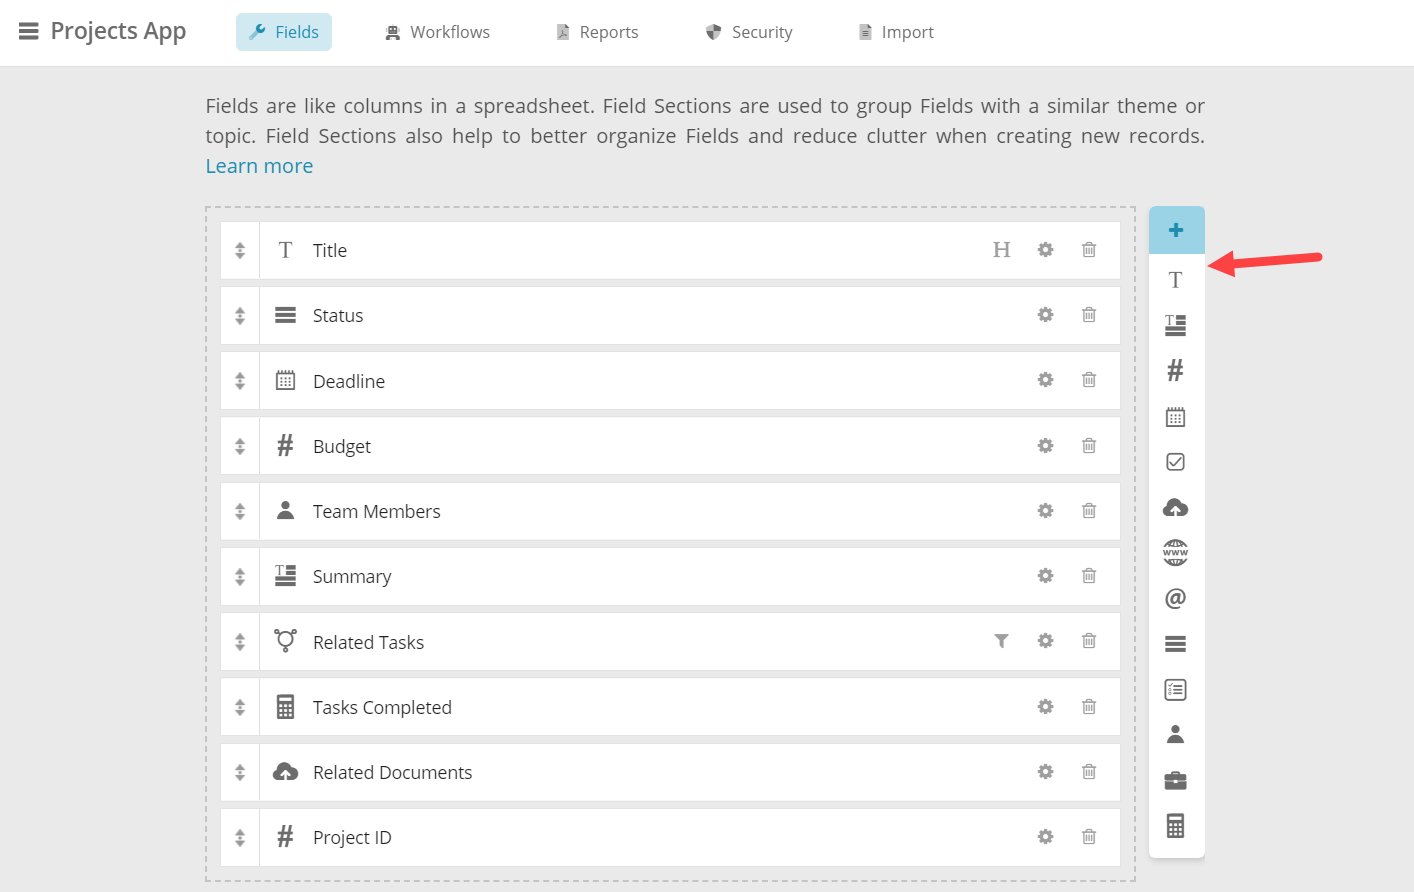
4. Add new Fields
Fields give structure to your data.
For our projects, we will need to track each projects Budget, Deadline and Status. Adding such Fields to the Projects App will let you track such information for each Project.
-
5. Modify the default Dashboard and add new widgets
Dashboards help you visualize data.
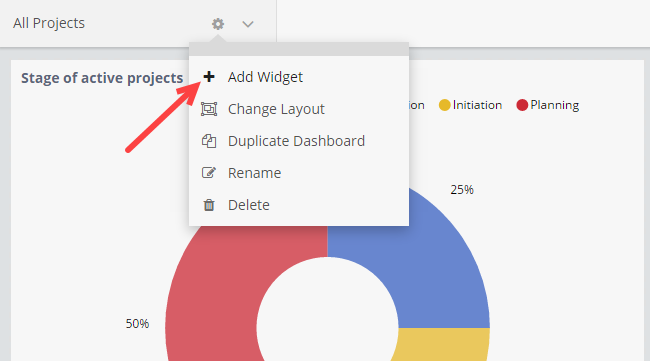
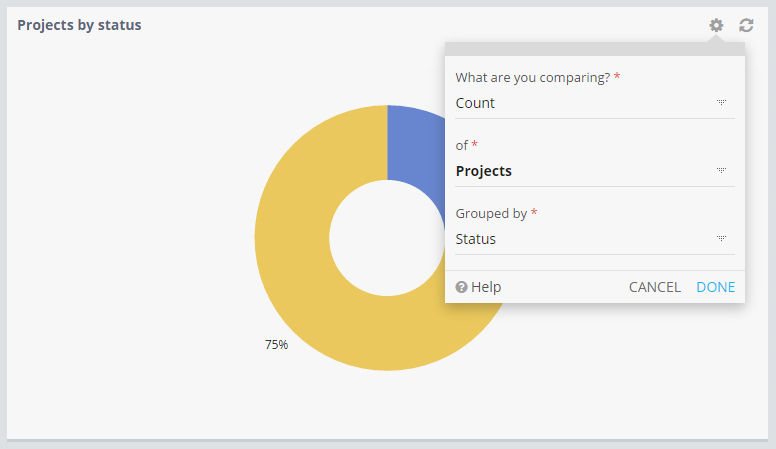
For example, you might want to add a pie chart to view the number of projects per status, as shown below:
Click on + Add Widget and choose the Pie Chart widget
Configure the Pie Chart to display the number of Projects per status
Copying an App
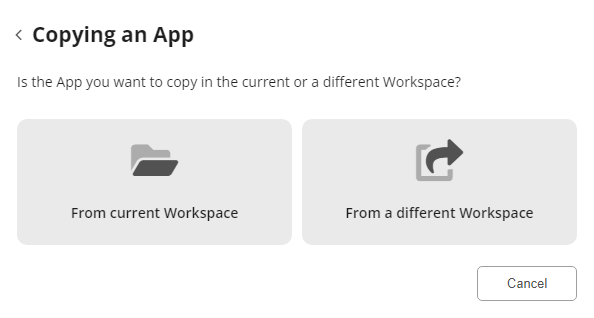
To copy an existing App, you need to first click on + Add a new App in your Workspace.

When you choose to copy an App, this will give you the option of picking up an App from your Workspace or from a different Workspace.
Creating an App Clone ID
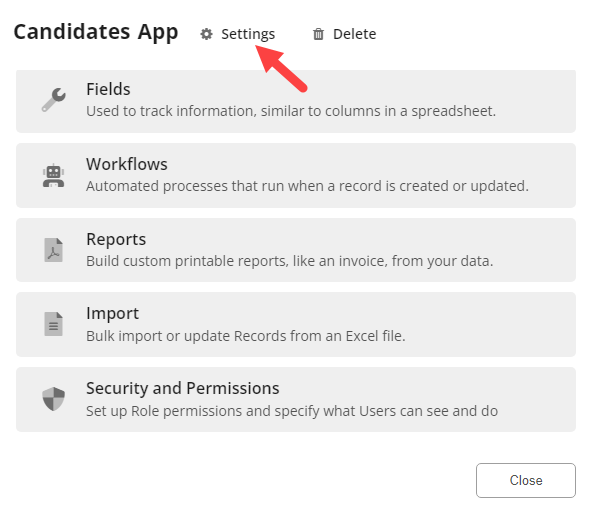
To copy an App from another Workspace, you need to first generate an App Clone Id from the Workspace where the App is present.
You can generate an App Clone Id by going to the Apps Settings and clicking on + Generate new Clone ID.
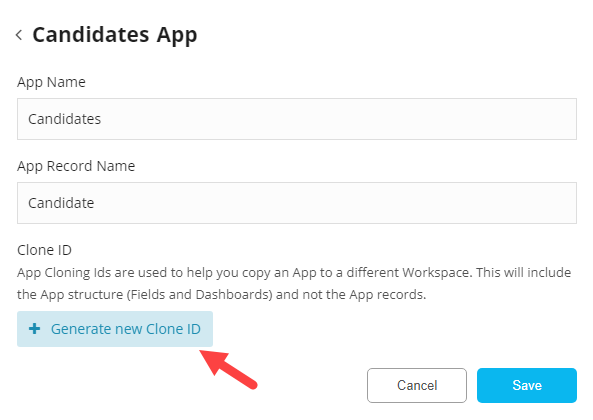
When copying an App, you will get a new copy of the App structure (Fields and Dashboards).
The data (App Records) will not be copied to the new App.
