Workflow Actions
Actions are executed after an event is triggered and all conditions (if any) are met.
Workflows can be made up of multiple actions, which are in turn, executed sequentially.

Path
Paths let you build more complex workflows and allow you to perform different actions based on different conditions. Workflows can have different outcomes, for example if A is true, then do X. If B is true, then do Y, and so on.
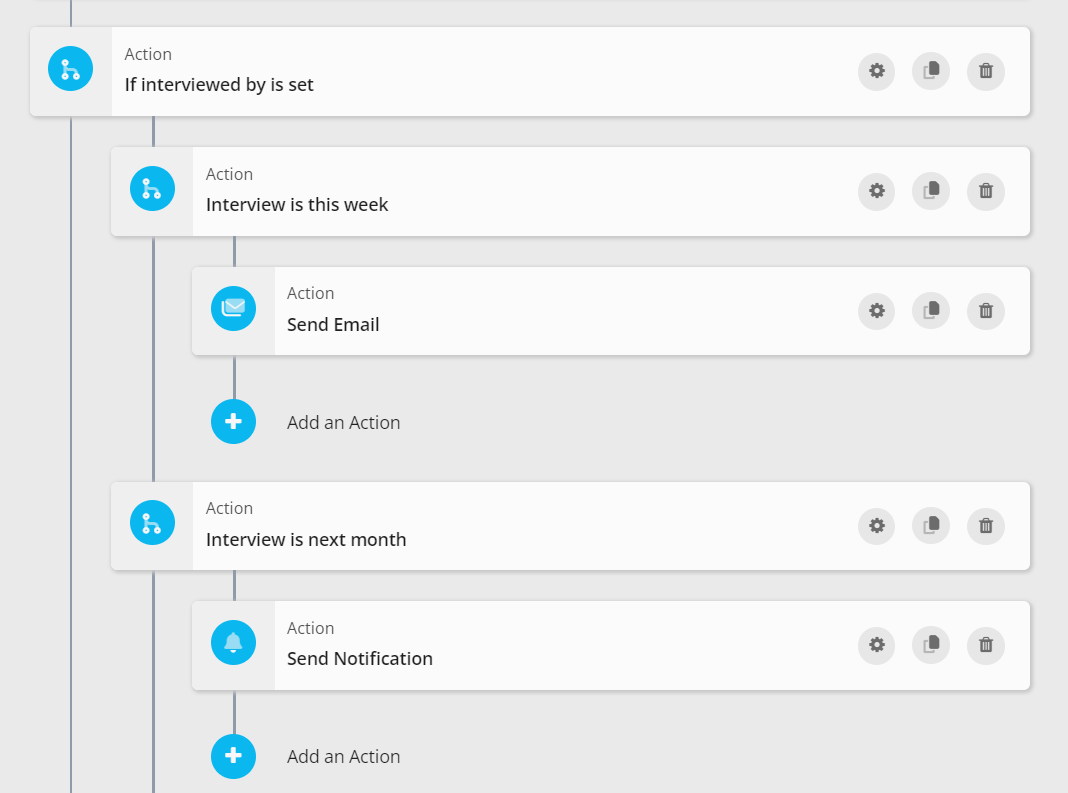
Each Workflow Path should have specific conditions, if those conditions are met (when the workflow is triggered), the workflow will execute the actions in that path.
You can drag any Workflow action in or out of your created Paths. This makes it easy to add Paths to your existing Workflows and use your already existing Workflow Actions.
You can use as many paths as you want in a workflow. Paths aren't included in the Workflow action limits.
You can use add up to 2 nested paths.
Creating new Records
This action will let you add new App Records that will eventually be created when your specified event is triggered.
When selecting this action, you need to choose a specific App. This is where the new record will be created.
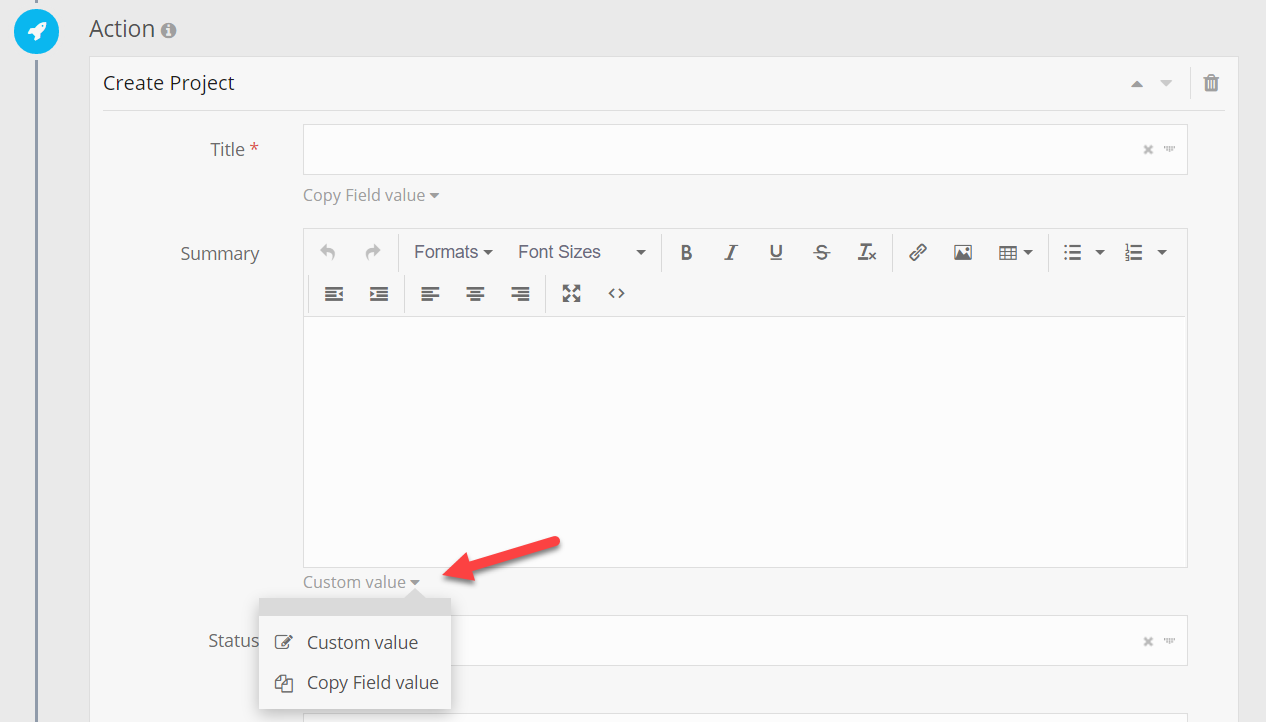
Once you select an App, you can set the Field values for the new record.
When setting Field values, you can choose between two options:
- Custom Value - This will let you set a constant value that is automatically set once the Workflow is triggered.
- Copy Field Value - This will let you set a Field value that is extracted from the Record that triggered the Workflow.
Note: To copy a Field value, a Field of the same type must exist in the record that triggered the workflow.
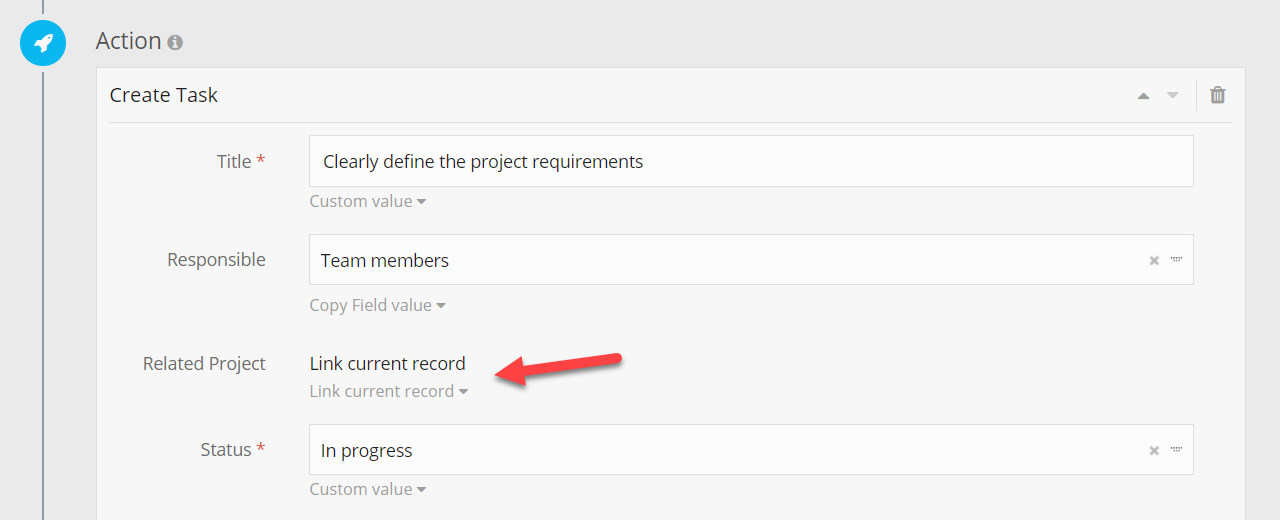
If there is an existing relationship between the App that triggered the Workflow and the App where you are creating the new Record, you can link the two Records together.
For example, when a new project is created, you can create a set of Tasks and link them to that particular Project.
Updating the Workflow Record
This action will let you update the Record that initially triggered the Workflow.
You can use this action to automate manual processes, enforce data entry rules and improve data integrity.
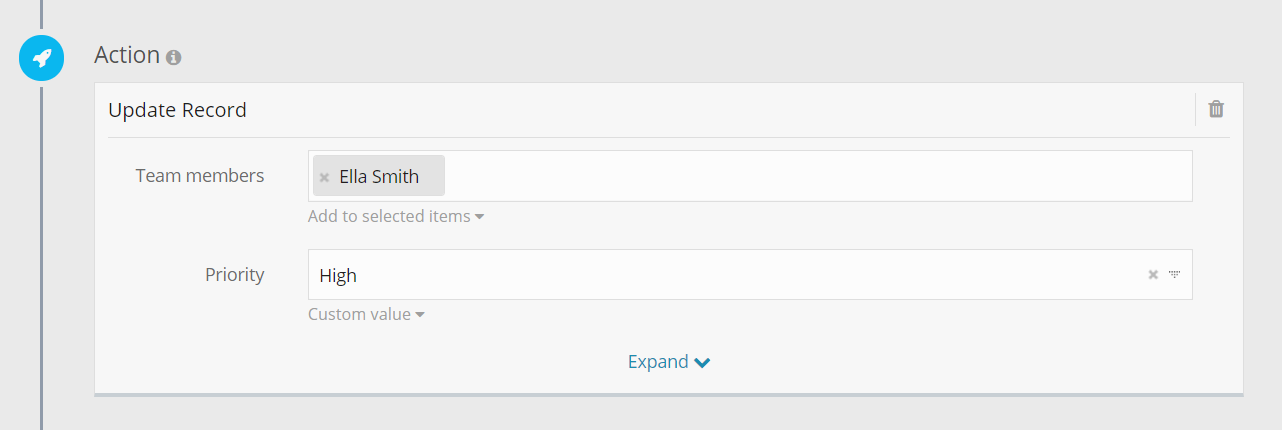
For example, if you are using the Kanban View to drag & drop Projects between different statuses, this action can help you automatically update specific Field values when the Project Status is changed.
In the following example, when the Project Status is changed, we're automatically adding Ella Smith to the Responsible team members and setting the Project priority to High.
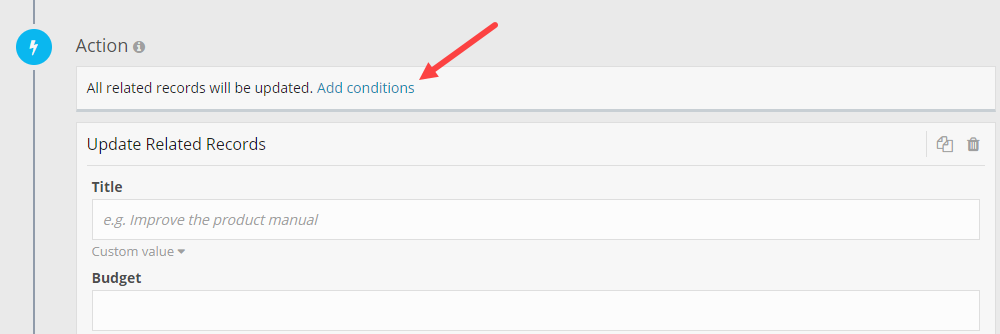
Updating Related Records
This action will let you update any records related to the record that triggered the workflow. For more information about connecting records, make sure to check out how App Relationships work.
Conditions can be used to specify which related records will be updated.
You can use this action when you need to automate processes based on triggers in related Apps. For example, you might want to:
- Update all open tasks when the status of the project is updated.
- Update the status of a contractor/freelancer when they are added to a new project.
- When a deadline for a milestone is changed, update the date of all the tasks in that milestone.
This action is performed in the background (not instantly). A message is displayed in the workflow activity to indicate whether the action is still ongoing.
Send notification
This option lets you send a custom notification to multiple members of your team. You can choose to notify the:
- Record followers
- Users selected in any Link to User Field
- Anyone in your workspace (including Lite Users)
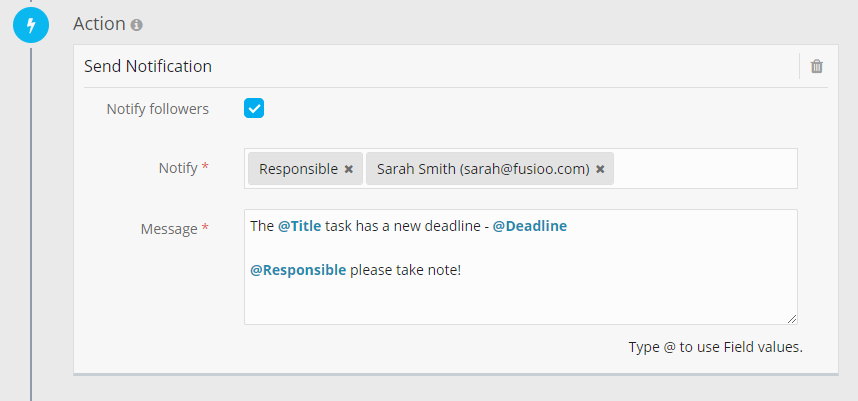
You can use @FieldName to write down Field values in your notification message.
Send email
This option lets you send an email to:
- Email addresses used in any Email Field
- Users selected in any Link to User Field
- All Users in your Fusioo account
- Any custom email address
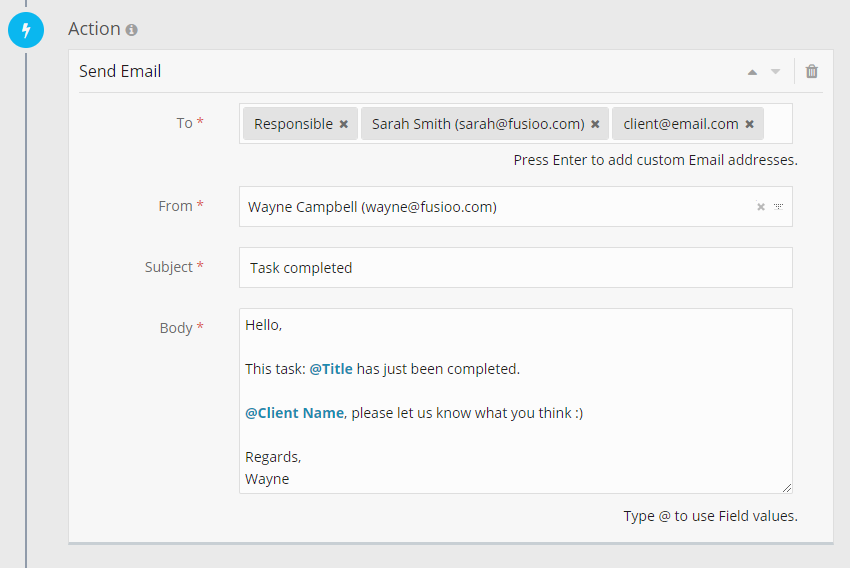
You can use @FieldName to write down Field values in your email message.
Carbon Copy and Blind Carbon Copy
By default, emails are sent from info@fusioo.com. When the default address is not used, the From address must belong to one of the Users in your Fusioo account.
When the default from address is not used, you will have the option to use carbon copy (CC) and blind carbon copy (BCC).
A separate email will be sent to each email address in the To field. All email addresses included in the CC and BCC fields will be receive each separate email.
Attachments
You can attach documents from File fields available in the record that triggered the workflow or any related records.
There are some restrictions in place to satisfy rules set by email providers.
- A single attachment can't be larger then 10Mb.
- The total size of attachments can't be larger then 24Mb.
- File names must be unique.
If any of those restrictions isn't met, the email is still sent. However, the respective attachment is not included.
Emailing related records
This option lets you use related records from connected Apps to send emails.
For example, you might have an App Relationship between your Tasks and Contacts App.
This means that each task can be related to a contact or multiple contacts. When you select Email related records, each contact will receive an email when a workflow is triggered on a specific task.
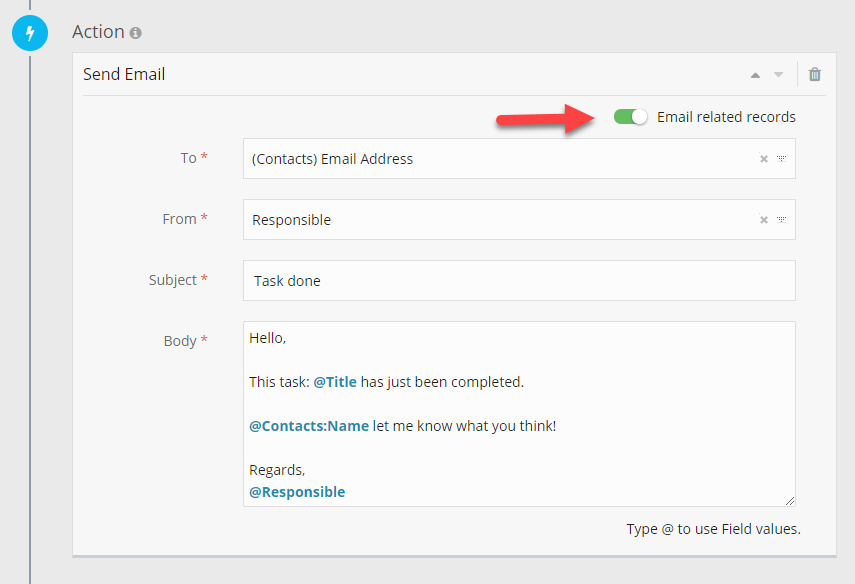
You can use @FieldName to write down Field values from the connected App in your email message. This way each email message will be specific to the person receiving it.
Configure a custom mail server
By default, Fusioo takes care of your email delivery. However, you can send workflow emails through any other SMTP server if you’d rather use your own service.
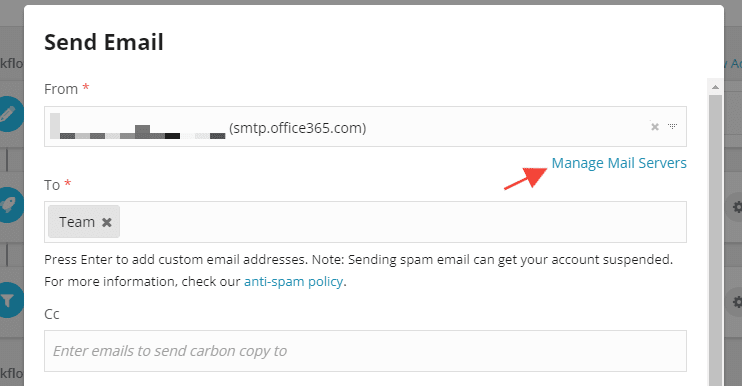
From any Send Email action, you can click on Manage Mail Servers to configure your own mail server.
Note: Emails sent through your custom mail server don’t count against your 1000 emails per month limit. Although other workflow limits still count.
Here you will find details that you need to fill out to connect to a custom mail server.
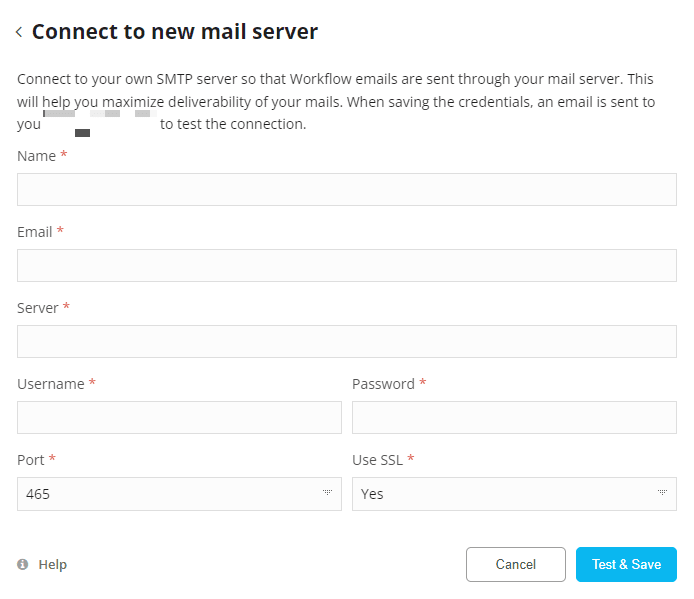
- Name - the name email recipients will see.
- Server, Username, Password, Port, Use SSL - For these settings, please consult with your email service provider. We have included instructions for Gmail/Google Workspace and Outlook/Office365 below.
How to use Gmail/Google Workspace to send workflow emails:
In order to use your Gmail account in Fusioo via SMTP connection, you have to enable 2-Step Verification in your Google account and generate an App password.
This App password is used to connect to third-party apps without revealing your real password.
To create an App password:
- Go to your Google Account.
- Select Security.
- Under "Signing in to Google," select 2-Step Verification (make sure it is turned on).
- At the bottom of the page, select App passwords.
- Enter a name that helps you remember where you’ll use the app password (e.g. Fusioo SMTP).
- Select Generate.
- The app password is the 16-character code that is generated.
- Copy this app password and select done.
In Fusioo, set the following mail server settings:
- Name - the name email recipients will see.
- Email - the email address you want to use.
- Server - smtp.gmail.com
- Username - your Google username
- Password - the App Password you previously created
- Port - 587
- Use SSL - Yes
How to use Outlook/Office365 to send workflow emails:
In order to use your Microsoft account email in Fusioo via SMTP connection, you have to enable 2-Step Verification in your Microsoft account and generate an App password.
This App password is used to connect to third-party apps without revealing your real password.
To create an App password:
- Go to your Microsoft Account.
- At the top, click Security.
- Click on Advanced Security Options.
- Under Additional security, make sure that Two-step verification is turned on.
- Under App Passwords, click on 'Create a new app password'.
- The app password is the 16-character code that is generated.
- Copy this app password and select done.
In Fusioo, set the following mail server settings:
- Name - the name email recipients will see.
- Email - the email address you want to use.
- Server - smtp.office365.com
- Username - your Microsoft username
- Password - the App Password you previously created
- Port - 587
- Use SSL - Yes
You can connect to multiple SMTP servers and manage them by clicking on Manage Mail Servers.

Sending a Webhook
Webhooks are a simple way with which Fusioo can "speak" to other applications and notify them automatically when something new happens.
This is done by sending record information in the form of a JSON message, to a URL of your choice.
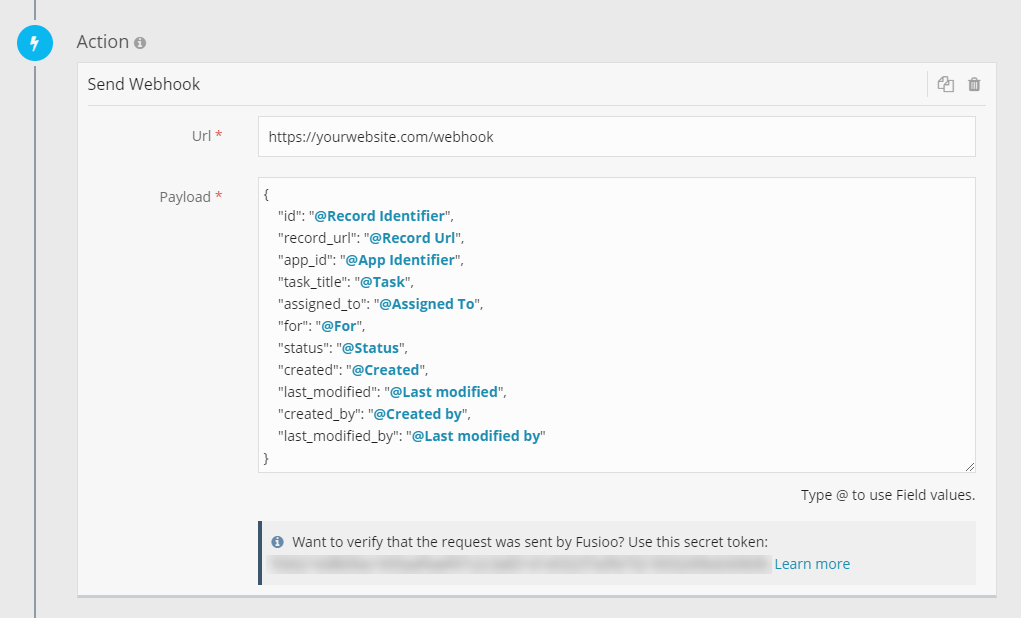
The JSON message formatting can be changed to satisfy the format required by the application receiving the data.
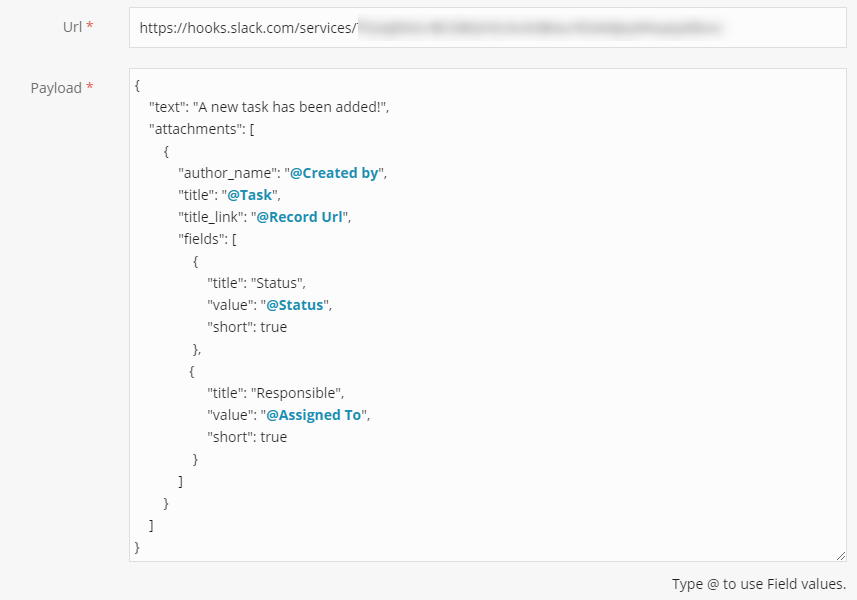
For example, to send a message in a Slack channel, you can change the previous JSON message to:
Technical Information
Before sending a webhook event, the JSON payload is validated. If the JSON is invalid, the webhook is not sent.
A webhook event is considered successful when the response status code is 200 (OK).
Retry Procedure
A webhook event will timeout after 60 seconds if no response is received.
The request is retried for 2 more times. If there is no response after 3 requests, the webhook event will be marked as failed.
The workflow activity log will display the reasons why the webhook event failed.
If the webhook contains invalid JSON, the request is not retried.
Security measures
A "fus-signature" field is included in the request header, this field will contain a SHA256 HMAC signature. For example:
fus-signature:48bacf789fd3161b377a67f334668468e7984ad26c2817ec...
This signature is added to make it easy for you to check that the request originated from Fusioo and that the payload content wasn't manipulated.
The signature is generated for each request, by hashing the payload using a secret token.
This token is unique for your account (all users in your account will see the same secret token) and is displayed under each webhook action.
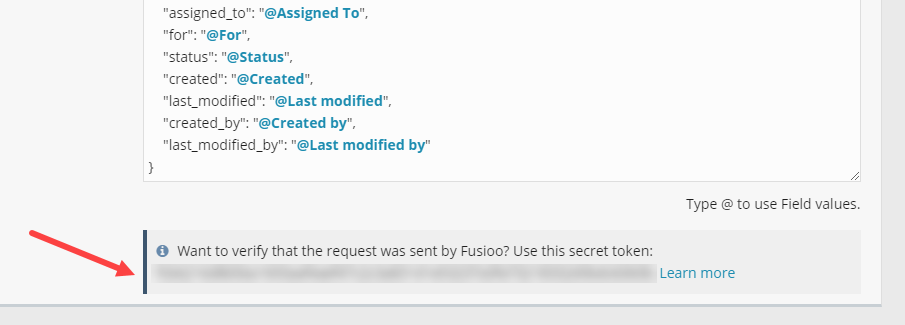
To verify that the content was not manipulated, you need to hash the request body with the secret token displayed in the webhook action. The result should match the signature contained in 'fus-signature'.
Create Share Link
This action generates a unique, public URL for a specific record. It allows you to share record data with people outside of Fusioo (like clients or external stakeholders) without requiring them to log in.
The link can be generated for the record that triggered the workflow, but it can also be a record created by a previous action in the workflow.
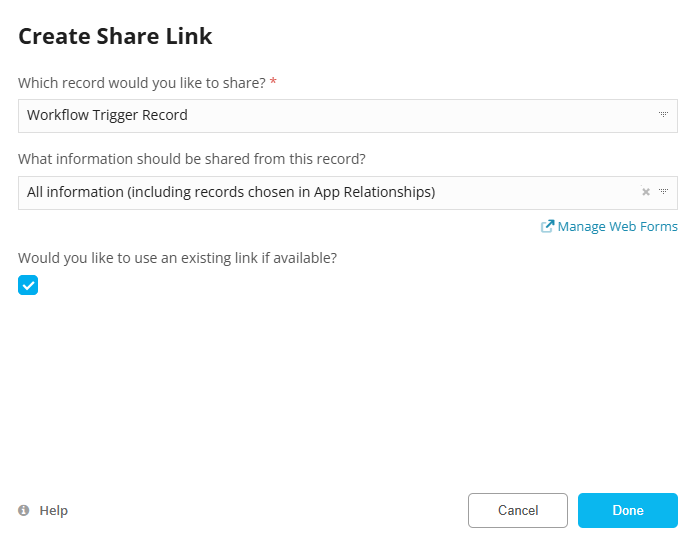
By default, the link will display all fields available on the record.
If you want to hide specific Fields or change the visual layout, click Manage Web Forms. This allows you to build a custom Share Record Form with exactly the data and design you want. Once created, you can select that specific form here.
Note: The action itself only creates the link.
To actually send it to someone, you must refernce this action in the email body of an Email action that follows it. Alternatively, you can manually share the link which will be available on the record itself once the worfklow is processed.
Loop
This action allows you to go through records linked to the record that triggered the workflow.
For any action you add inside the loop, you can use data from the record currently in the loop, the record that triggered the workflow, or for specific actions, both.
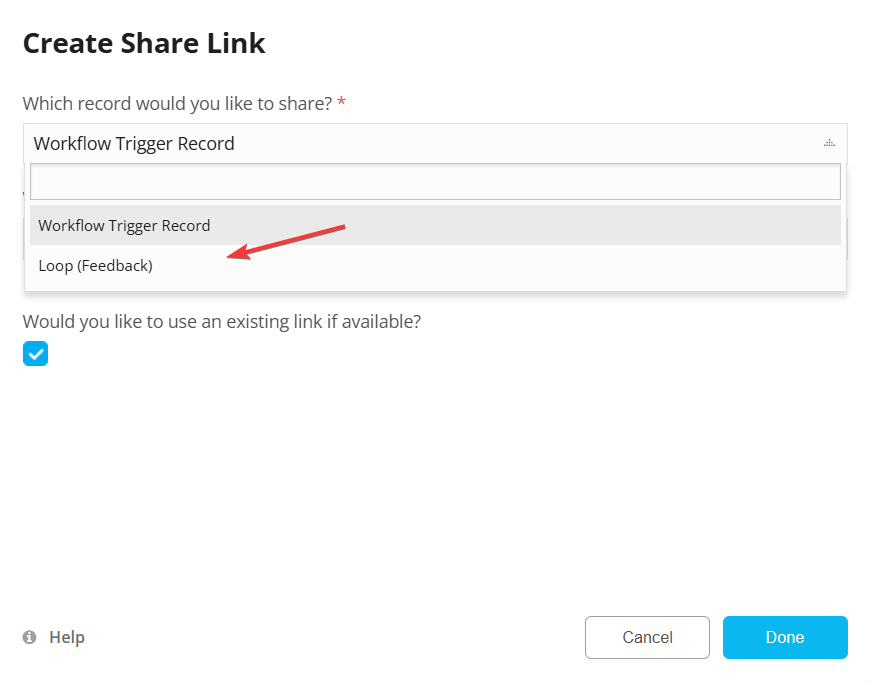
You can update the related records, create a publicly shareable link, send emails using their information, send Webhooks with their data to any third-party application and so on.
Conditions can be used to specify which related records will be looped through.
This action is performed in the background (not instantly). A message is displayed in the workflow activity to indicate whether the action is still ongoing.